A hands on look at what lives on the Kimberly sea floor

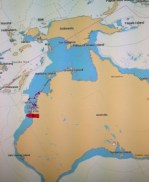
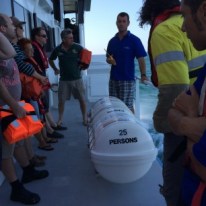
Welcome back! We are now on day 3 since arriving in the study area (Sunday 6 Dec 2015).  See where we are right now.

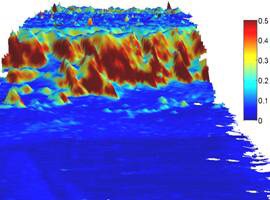
In my last blog, I showed you how we can see live video footage of creatures and habitat on the sea floor without even getting wet (using the Tow-vid system).

Sometimes, though, scientists need to see creatures first hand in order to understand more about them and where they live. For that reason, on this expedition we are also collecting samples of sea floor creatures for scientists from the Western Australian Museum and elsewhere to study.

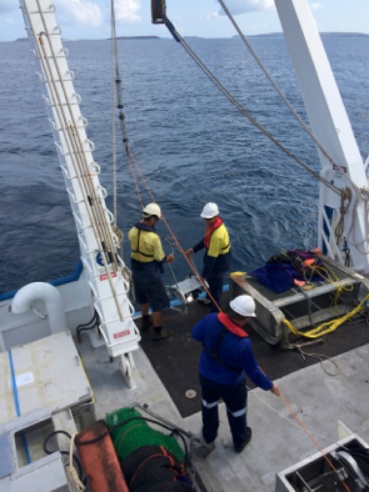
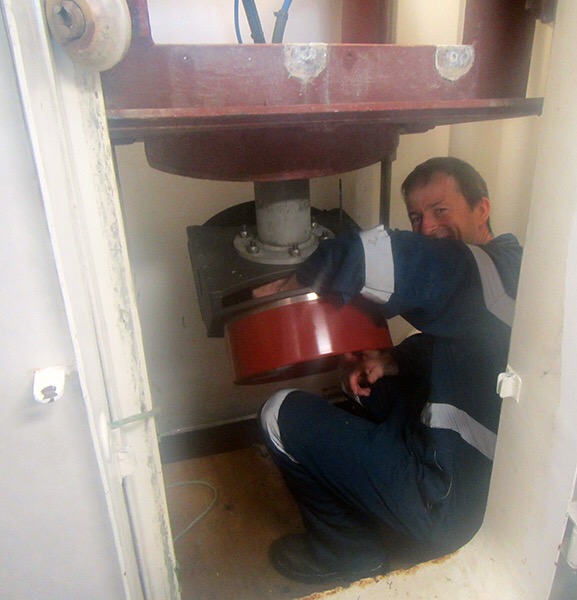
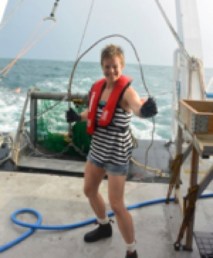
To do this, we are using a large metal frame with a mesh bag attached to it called a sled (see below). The RV Solander crew lower the sled carefully into the water using a strong steel cable until it hits the sea floor. The RV Solander then slowly moves forward for 50 to 100 metres as the sled drags along the sea bottom, collecting sand, mud and critters in the mesh bag. Then the crew then slowly pull up the sled using one of the several heavy duty winches mounted from the upper deck.

RetreavingASledOntheSoander
RV Solander crew carefully raise the sled, secure it on deck, lift the mesh bag over the sorting table, and release the contents

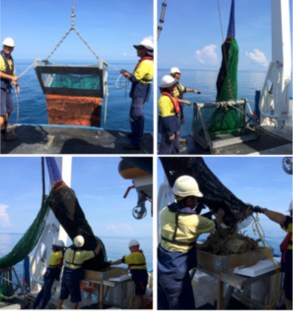
Once the sled is securely anchored to the deck, the crew use the winch to raise the mesh bag above a sorting table and empty the bag.

Sorting sled contents

The next step is to sort everything that came out of the mesh bag into groups based on what kind of animals and plants they are (see below).

SortingSamples
WA Museum and CSIRO scientists sort samples into groups on the back deck of the RV Solander

Measurements, photos and preservation

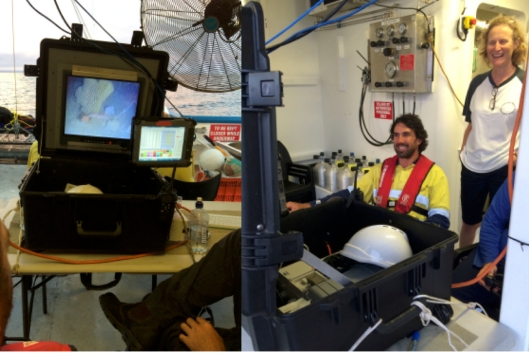
Samples are then weighed, assigned a unique ID number and bar code and then recorded in a computer database (see below). A series of photos is taken of each specimen with its bar code for later use by scientists on land in the laboratory.

CatalogSamples
WA Museum scientists carefully weigh, catalog and photograph each specimen.

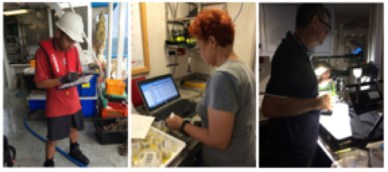
Caption: WA Museum and CSIRO scientists carefully weigh, catalog and photograph each specimen.

Finally, the specimens are then carefully stored in a liquid that keeps them from decaying or are frozen. This keeps them fresh until they can be analysed back on dry land in the lab.
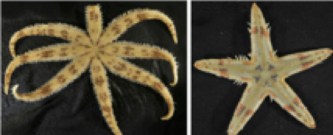
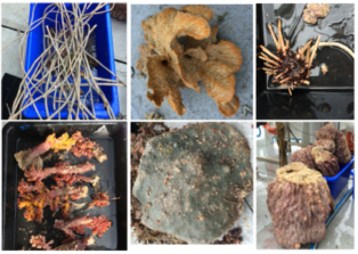
Sample sled hauls

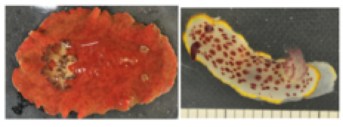
A few examples of the types of creatures we’ve found so far are:

StarFish
Examples of starfish. Most have 5 arms, but some have 8 or more. An arm can regrow if lost to a predator.
CoralCrab
Example of a coral crab.
Nudibranchs
Nudibranchs (sea slugs) eat sponges and leave a ‘slime trail’ where-ever they go to avoid getting lost
SeaCumbers
Sea cucumbers are so named because some people consider them a delicacy. Don’t eat the ones shown here though because they are poisonous!
FeatherStarts
Examples of feather stars. The one on the left is broken and you are seeing the top of it. The one on the right is intact and you are seeing the bottom of it. It has nearly 100 arms!
AssortedCreatures
Examples of creatures collected. Clockwise from top left: sea whips, sponge, sea urchin, soft corals, sponge, sponge.

Now that I’ve given you an idea of the ways we are exploring the Bonaparte Archipelago, the rest of my posts will focus on interesting creatures or habitats we find along the way.

MarjiWhips
Sea whips look just like their name.

Thanks for reading – see you next time!


Exploring the sea floor with video


When most people think of marine scientists discovering underwater habitats and creatures, they assume those scientists will be swimming underwater using SCUBA.

But Western Australia’s Kimberly coast has extremely high tides that create treacherous currents that make it too dangerous for divers.Watch a video about how the tides work. Not to mention the tiger sharks   and crocodiles that infest these waters!

CrocAndShark
Salt water crocodiles and sharks make it dangerous to SCUBA dive offshore from northern Western Australia.

Plus, we are interested in parts of the sea floor that are too deep for divers (40-100 metres deep).

How do you see what is on the sea floor when it is too deep or too dangerous for divers?

AIMS have developed a solution – attaching a camera and a video camera protected in waterproof cases to an aluminium sled that can be towed behind the ship using a long strong cable. This is called the tow-vid system (see below). A powerful strobe light illuminates the sea floor for the video.

TowedVideo
RV Solander crew prepare tow-vid


The ship’s powerful winch lifts the tow-vid system into the air and the crew carefully guide it into the water. Note how everyone involved is wearing hard hats, life jackets and steel toed boots!


TowvidWinch
RV Solander crew lower the AIMS tow-vid into the water.

Once the tow-vid is submerged and lowered to the sea floor, the ship slowly moves along a predetermined 1.5 km long transect line at a constant slow speed. The video camera continually records and transmits to a computer on deck.

Watch a sample of what the tow-vid saw today near Augereau Island.

TowvidStills
Examples of still photos from tow-vid on this trip: top = sea cucumber, middle = sponge, bottom = feather star.

Still photos of the sea floor are taken at regular intervals and downloaded once the tow-vid is back on deck. Later, back on land, scientists analyse these to identify the species of animals and plants they contain.

Examples of still photos from tow-vid on this trip are on the left : top = sea cucumber, middle = sponge, bottom = feather star.

While the ship is moving along the tow transect, two scientists are responsible for keeping the tow-vid on track, and recording data as it operates.

First, a tow vid technical expert (in our case, Neill), watches a computer screen which shows live footage from the underwater video camera. He uses this as a guide to change the speed and direction of the tow-vid via the winch so that it doesn’t hit the bottom, and also so that it is close enough to the bottom to be able to see the habitats and creatures there as clearly as possible.

TowVidTec
Tow vid technician Neill steering the tow-vid using the joystick in his hand.


Second, a marine scientist (in our case Marcus) watches the live video footage and regularly clicks a button on the smaller computer screen to record what type of habitat he sees on the sea floor in a computer database. This can be used to create maps of the study area.


CollectingTowedVideo
Live video footage from the towed video as viewed on deck, and Marcus recording what he sees as Neill drives the tow-vid.

Back on dry land, spatial scientists then use this data to map where various habitats were found. The first step is to colour code each location where Marcus made an observation as a point along the track the ship towed the tow-video system.


TowvidWormPlot
An example of ‘Worms’ map

To end for today, below is a map of where we are working today. The red line shows the path followed by the RV Solander. The blue numbers show were we plan to run tow video transects.

TripProgress051205

I hope you are enjoying this blog! Leave a comment and let me know what you think. I will post again in a day or so.

Mapping the sea floor…

Last night we finally arrived at our destination (See where we are) while the sun sank into the Indian Ocean!


Spatial scientist and blogger (Marji) soaking up the serenity.
Now that we’ve arrived, we plan to:

  • Map the sea floor.
  • Examine the habitats and creatures that live there.
  • Measure how much light is in the water, how hot it is, and how salty it is.
  • Measure how much the water level changes with the tides.

In today’s blog, I’ll explain a bit about how we map the sea floor.

You may think that the sea floor is flat, but it can have seamounts (underwater mountains) and canyons and everything in between, just like dry land (see example below).


An example of a 3d map of the ocean floor.
How can we tell what the sea floor is like when it is hidden under 10s to 100s of metres of water?

In the past, ships dropped long ropes with heavy weights on them to measure the distance from the surface to the sea floor.

Today we use sound waves to measure this distance – it is much more cost effective.  This is called sonar (watch a video of how it works).

We attach a high-tech instrument (a multi-beam sonar) underneath the ship (see below).


Installing the multibeam sonar on the RV Solander

It sends sound pulses downward. The time it takes for the sounds to hit the bottom and bounce back to the ship tells us how deep the sea floor is and whether it is made of sand, rock or mud (see picture below).


An example of how sonar works.
We have two scientists on board in charge of our sonar.  Nick operates the sonar and Iain (below) analyses the data to create 3D models of the sea floor.

Sonar data processing in the ‘dry laboratory’ on the RV Solander
For example, here is data from a test run completed on our way to the study area. Blue areas are deepest and red areas are shallowest.


Example of sonar data recorded in a test run.

And here is a map of the route the ship will take (blue lines) through the study area to map the sea floor with sonar. Where possible, we run sonar at night to free up the days for other work.

Sonar survey plan (blue lines). RV Solander shown in red.
In my next post, I’ll explain how we use a towed video system to take photos and record video deep under water.

See you then!

And we’re on our way…

map
Map of our journey along the West Australian coast.

The RV Solander has left Broome (See where we are), steaming northwards to our study area in the Bonaparte Archipelago!

It will take us more than a day and a night (about 30 hours) to get here – Western Australia is bigger than you may think.  The red line on the map above shows you our entire journey.


karen
Cruise Leader Karen en route to the RV Solander

Safety at sea is very important. Our Cruise Leader (Karen) makes sure everyone on board is prepared for the journey ahead. Here she is riding in an a zodiac (small inflatible boat) from the dock  in Broome to the ship.


rob.jpg
Skipper Rob steers the ship

Our Skipper (Rob) makes sure the ship gets us where we need to be safely. Here he is in the wheelhouse, steering the ship.

And we all learn the safety rules of the ship-

liferaft.jpg
All science staff attend the safety induction before we get underway.

including how to use the life raft.

In my next post, I’ll explain some of the ways we plan to explore the study area!

Preparing for the expedition…

Welcome to this blog!

Keep checking to see the latest discoveries and adventures of an expedition of discovery to the seas around the islands of the Bonaparte Archipelago located offshore roughly halfway between Darwin and Broome.

The Western Australian Marine Science Institution (WAMSI) is sending scientists from:

to learn more about the coral reefs, sponges, and other creatures that live in this little studied region of Western Australia’s amazing coastline.

As the scientists and crew of the AIMS research vessel the RV Solander get ready to set sail on 2 December 2015, you can learn more about the research vessel that will transport them to this very remote region in the Indian Ocean.

Well before the journey begins, scientists think carefully about what they want to try to discover and where they should look.  Travelling by boat is expensive and it is not possible to visit every single place where important and interesting habitats and sea creatures might live.

The next blog entry will explain what we hope to discover and why, and how we will do so!  See you then.